Wednesday, May 18, 2016

Bass Fishing 401

Bass Fishing 401:


     I see a lot of "Fishing 101" articles, and videos, and blogs, and vlogs, and pogs, and even a shmog or two about the basics of fishing.  But this isn't an entry level course on fishing (or grammar for that matter, just look at all the rules I've broken in these first two sentences!). This is the 400 level.  The point in your education where the pupil becomes the master.  Where you are trusted with the responsibility of taking a new human mind under your wing, to form a student of your own in the likes of your self.  To pass down not just knowledge of a game, but a legacy of champions.  A student that will one day grow into a master himself.  More powerful than you could ever imagine.  A master, who fueled by fear and suffering, turns to his powers to cheat death and save the life of his beloved baby momma.  A master with a false hope that his power of this force can be used for good.  To rise and unite the galaxy as one under the Galactic Emp....  Wait, no, that's Star Wars.  Fishing.  We're talking about fishing....

     What I'm trying to say is, this discussion is not about you.  You already know how to fish.  This is about teaching others.  And let me make one thing clear, sharing this article to your rookie friend is not going to teach said friend to fish.  That's right, in a cyber world of shares and viral media, I'm telling you NOT to share this article!  Instead, use it to share YOUR knowledge.  Use it to pass down a lesson the way education is supposed to work, through real life human connection.

     Throughout this article, I've emphasized with bold some of the more specifically educational points.  These points are important to keep in mind throughout the whole process, and even when teaching non-related fishing items.  I spent WAY too much money on used text books in college, and these are the kind of things that were already highlighted in them.


Lesson 1:  The Bobber Rig

     If your student is a 5 year-old child or a girl you met on Tinder, then this is a great place to start.  If your student is anything else there's a better way.  In short, "Lesson 1: The Bobber Rig" is don't use the bobber rig.


     For most people, staring at a bobber is boring.  Its a common theory among childhood development experts that children have an attention span of minutes equal to their age.  This means that a six-year-old can focus on that bobber for about six minutes before he'll get bored and grouchy.  However, in my experience, working with children everyday from ages 5 to 12 as an elementary school teacher, this pattern cuts off at about 10.  Anyone older will have their cellphone out texting, or on Instagram, before the bobber even hits the water.  I can't tell you how many teenagers I've met who were turned off to fishing because they learned with a bobber but weren't old enough for the beer that MUST accompany this kind of fishing.


Lesson 2: Equipment

     Working with big, heavy equipment can be difficult for someone first learning.  Regardless of if they are learning with spinning gear or a *baitcaster, downsizing the equipment will help them to feel more in control of it.


     I'd recommend a medium power, fast action rod not over 7 feet long.  Carrot Stix (as shown in the photo above) make some great rods for every level of angler from novice to pro.  The carrot-based fibers that give the rods their name translates to a rod that's both lighter and more durable than many rods on the market making them a great choice for a beginner that's going to be rather tough on a rod.  You can find more info on Carrot Stix HERE if you're in the mood for an orange rod!
     
     Whatever rod you choose, spool it up with a high quality mono-filament line around 10 to 12 pound test.  Trying to cast the cheapest line from the bargain bin at Walmart is difficult for the best of us, it's not going to make casting for your student any easier either.  However, don't use high priced braid or fluorocarbon.  You are going to be dealing with a lot of birds nests, loops/tangles/knots, and nicks in the line from casting into trees, bushes, rocks, fences, and anything else that may be up on the shoreline.  After just a trip or two, that line may be ready to be replaced.

     Set your pupil up with a small tackle box of a variety of "do-nothing" and "cast-and-wind" lures.  Examples of a do nothing bait would be something like weightless wacky worms and shakeyheads.  These are lures that you cast out and let sit for longer periods of time (but not so long as to bore the student).  Lures that you may relate to the term "dead sticking" are great choices.  Cast-and-wind lures are generally reaction baits like crankbaits, spinnerbaits, and small swimbaits.  Basically, you want to avoid any kind of presentation where you have to impart your own action on the bait.  The student has enough things to worry about at this stage, cadences and whatnot are just going to over complicate and confuse them.

*Don't be afraid to start someone with a bait caster.  I learned to fish with them when I was about 7 or 8 years old, a teenager or older certainly can too.
**But definitely avoid the spincast reels.  Not only do they tangle up and break all the time, they teach bad habits.  The release point is at a very different time than other reels, and the locomotor movements within your hands and thumb are opposite of others.  Just like the bobber rig, unless you're teaching a five-year-old, just say no to spincasts.


Lesson 3: Casting

     If you can't cast, you can't fish.  Teaching someone to cast is the MOST IMPORTANT PART (I capitalized that for those of you that skim through these and may miss something)!  Your student simply won't catch a fish if they're only casting 15 feet in random directions.  I can't stress this enough, casting should be the number one concern for both the teacher and the student.  This lesson should be broken down into two smaller lessons: distance and accuracy.


Distance:

     This is the time for your cast-and-wind baits.  Spinner baits like the Boyd Duckett BD Series Spinner Bait, Yo-Zuri 3DB Lipless Crank, and the Olympic Lure's jointed swimbait are all great cast-and-wind lures that won't run too deep and get snagged on the bottom.  These lures, plus many more, can be found in this month's Lucky Tackle Box.  Check them out HERE if you are so inclined.
     The key is repetition.  The more casts you can get in each trip, the more practice they will get at it, and the more progress that will be made.  Even if the fish aren't on a reaction bite, keep hammering away with those cranks and spinners.  It's not about what's best for the fish, but what's best for the student.
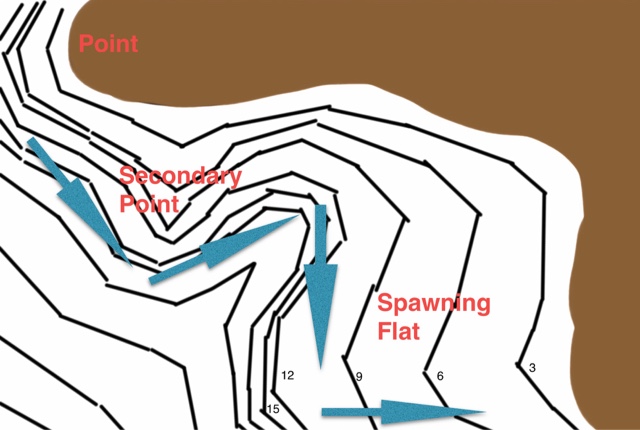
     Find some off-shore structure to fish and place a marker buoy out on top of it.  Tie on a crankbait that runs just deep enough to get down to the structure, but not more.  It doesn't need to drag the bottom or get hung up in the brush piles, remember the focus is casting, not catching.
Position the boat about 30 feet off the marker.  The goal should be to cast past the marker, not to it.  At this point, we're working on distance so the marker is a goal, not a target.  As needed, back the boat further away from the marker until they can consistently reach 50 to 60 feet.
     Don't force a technique on them, let them figure out what's most comfortable.  A two handed over hand cast might be the best way to get distance for you, but maybe a slinging side arm cast is the most comfortable for them.  Let them discover the tweaks they have to make to all the little details of the cast.  Explaining every last thing to them and nagging them about every detail is just going to ruin it for them.  After all, everyone casts a little bit differently anyway.  As long as they don't look like Charles Barkley's golf swing, they're going to be just fine.

Accuracy:

     Tie on something small and compact, but heavy enough to cast pretty easily.  This is a time for those "do-nothing" baits.  For a baitcaster I'd recommend something like a jig or a Texas-rig from about 1/4 to 1/2 ounce.  A small shakeyhead worm or weightless 5-inch Senko would be a good choice for spinning gear.  Cactus Wren Outdoors, HERE, makes a great little shakyhead jig head.  Pair the Rock Hopper up with a 5-inch Quail Tail or Talking Stick soft plastic and you have a great little compact, weedless, fish-catching thingamabob (Yup, a thingamabob).  Whatever you choose, make sure it's weedless!  Your student is going to be throwing that lure into all kinds of crap on the shore line, and it's your job to go dig it out.  The more exposed the hook is, the tougher it's going to be to get it out of those tullies.
     Find a location along the shore that doesn't have too much vegetation, rip-rap banks work great.  Have your student pick a rock around the shore line and cast to that rock from different angles.  Each angle will slightly change the distance as well.  This is important!  Accuracy is not about just hitting your target from left to right, but distance as well.  It doesn't matter how well you can cast along the X-axis if you're constantly over shooting (or under shooting) your target.
     Once they feel comfortable controlling the distance, move on to some isolated cover.  Stumps and stickups on shallow flats are great high percentage areas that give them a great chance to get bit at this early stage.  Have them focus on casting to either the left or right of the target, but not directly on it.  Not only will this mean less hang ups, but the larger target will give them more confidence.  Missing their target (a tiny little stick) will discourage them, but casting into the larger area will make them feel more comfortable.
     Use this time to tell them a bit about the bass's feeding habits or seasonal patterns.  These habits are why accuracy matters.  The "why" is important to motivate the student.  Were you the kind of student in school that put less effort into math class because no teacher could ever tell you why you needed to know logs, factoring, and the quadratic formula to succeed in life?  They probably were too, and maybe still are.  So consider the conditions.  Is there current where you're fishing?  Bass will be on one side of the cover or the other based on current.  Post front conditions?  Bass will be holding closer to the cover, and accuracy is more important.  Is there shade on the water from docks, cliffs, trees, clouds?  Bass will be more willing to leave the cover and chase down baits so accuracy isn't as important.

Lesson 4: Setting the Hook

     Unfortunately this is a situation that you can't recreate on your own.  It's also not a situation that occurs all that often on its own.  The K.I.S.S. method is important here, and no I'm not referring to Jimmy Houston kissing each fish.  There are a ton of acronyms in the education world, but none as important as KISS:  Keep It Simple, Stupid!


The process should go something like this:

1. Feel something on your line?
2. Lift the rod tip up and reel in!

It really is that simple, stupid.

     This isn't the advice I give to advanced anglers.  An advanced angler should know that various types of lures need different types of hooksets in order to increase your hook up ratio.  And I absolutely loath the sayings "when in doubt, set the hook" or "hooksets are free".  In my opinion they are just wrong, wrong, WRONG!  But that's another article...  I regress...  In this instance, if anything feels different, have them set the hook!

     Keep it simple with regards to step 1:  "I don't know what a bite feels like."  So set the hook on everything.  If your student feels something and sets the hook on nothing, now they know that's not what a bass feels like.  Eventually they will feel something and set the hook to find a bass on the other end.  That's what a bass feels like!  In order to learn it, they have to experience it.

     Keep it simple with regards to step 2:  More times than not, a bass will hit a lure and swim down.  To set that hook and turn him around, you want to put opposite resistance on that hook point, so pull him up!


Lesson 5:  Landing the Fish:

     Don't be a jerk, get down there on your knees and grab it for him!  One of these days he'll feel confident enough to grab yours for you.  That's the sign of a true partner. (Are we still talking about fishing?)


     Seriously though, don't be a jerk.  This might be a long time friend and you've busted each other's balls all your life.  Maybe it's a buddy from work that you always give some crap to in the break room.  But by agreeing to let you teach them something, they've put themselves in a pretty vulnerable situation. Now isn't the time to be tough on them.  Be cool.


Lesson 6:  Be Sure to Catch Fish

     Success breeds confidence and confidence breeds success.  Take your buddy fishing to a place, and on a day, where you know you can catch fish.  No one likes getting skunked, especially when they're first learning.  Catching fish from day one is a huge confidence boost and will make them want to go out again and again.  You've only got one shot at that first impression.  If their first impression is "we fished for 7 hours without a bite, all I got was this sun burn," it's going to be real hard to convince them to go out a second time.


     It's important that YOU catch a fish or two as well.  A good teacher needs to be a master of the skill.  The old saying "Those who can't, teach" is complete nonsense!  Teachers need to be able to show examples and prove their knowledge and skills to the student.  As a student, it's awfully hard to respect the teacher and learn from them if you don't really believe they are a master in the first place.


Lesson 7: The Retrieve

     It may seem a bit out of order to be discussing the retrieve after hookset and landing, but remember that up to this point your student should should only be using simple cast-and-wind lures, and do-nothing lures.  Retrieving different types of lures in a variety of ways is a relatively advanced topic.  Lesson 7 probably won't be discussed until a few trips in when your student has already mastered distance and accuracy.


     Obviously retrieving the lure will depend on what the lure is.  A wacky worm is worked in differently than a spinner bait, a craw imitation bait is retrieved differently than a shad imitation.  When explaining the retrieve, start from the end-goal.  Teaching from the end to the beginning is huge in the education world, we call it "backwards design".  The theory is that the student will have a better understanding of the process if they already know the end result.  They may even fill in the blanks on their own!

So what is the end result?  Well, it depends on what the lure is.  A Texas-rigged Rage Craw's end result is to look like a crawfish.  Crawfish swim, or bounce if you will, in quick short bursts backwards.  That's what should be explained to the student.  If they understand how the real life prey works, they can figure out on their own how to make the lure do that (by quick pops of the rod upwards).  If you simply tell them to quickly pop the rod upwards, it gives them a lot of variables to guess at (How quickly?  How far of a pop?  How often do I pop?).  If you explain to them and show them how the bait moves, they can figure out the finer details on their own.

     The same goes for any lure!  Start with the end.  What are you imitating?  What does that look like?  Then go find some clear water and experiment until your student figures out what to do


Final Thoughts:

-Your student should be fishing more than you do!
- If you're out on a boat, don't stick them in the back seat the whole day!
-Teaching is a tiring activity, you need to constantly be involved with your student's progress.  Keep and eye on each cast.  Compliment every success and criticize each mistake.
-Keep the lectures short and to the point.
-Keep them active, repeating cast after cast, success after success.
-Make that first fish the biggest deal in the world!  Doesn't matter if it's a half-pound dink, or a six-pounder.  A first fish is reason to celebrate!

     Most importantly, it doesn't matter how old someone is.  They're never to old to fish for the first time.  And despite the picture at the start of this post, fishing really isn't that easy.  A helping hand can go a long way!

     Tight lines!

Wednesday, April 27, 2016

Feelin' Lucky: April 2016

Feelin' Lucky: April 2016

"Feelin' Lucky" is a new series of blogs I'm starting on a monthly basis with the help of the folks at Lucky Tackle Box.  The point of these posts will be two-fold; I'll be discussing a bit about Lucky Tackle Box, a great company that sends out subscription boxes filled with tackle each month from established tackle makers, along with some up and coming small businesses making their way into the fishing industry.  Secondly these posts will act as in-depth fishing reports for the particular lake I go to each month.  Hopefully you and I will each learn something new along this endeavor.

So, last weekend I decided to unload all my tackle from the Hobie and take with me only my Lucky Tackle Boxes and a handful of terminal tackle that I would need for the baits in the box.  For a trip like this, I should have considered Bartlett Lake.  Bartlett is located just north of Phoenix, AZ and is the only lake nearby where you can regularly catch 20 fish in a day.  The problem is they are stunted fish, I've never seen much over three or four pounds pulled out of that lake.  It is however, the perfect lake for a trip where my goal is to catch numbers, or on a variety of lures like all of them in the Lucky Tackle Box.

But I didn't do that.

No, I went the opposite route.  I loaded up and made my way to Canyon Lake, the "Land of the Lurkers", as it is often called.  The last three state records came from this lake.  It's the definition of quality over quantity, and the last choice I should consider for this experiment.


LTB Standard Box:

Lunkerhunt Bento Baits
V&M Baits J-Bug
RAW Panfish Swimbait
Reaction Strike Suspending Jerkbait
Mustad Grip Pin Flippin' Hooks

LTB XL Box:

Lunkerhunt Bento Baits
V&M Baits J-Bug
RAW Panfish Swimbait
Reaction Strike Spybait
Mustad Grip Pin Flippin' Hooks
6th Sense Lures Squarebill
Strike King Swinging Sugar Buzz Bait

Right off the bat I noticed two important things about this box.  One, how well the box is aligned with April's seasonal patters; two, the wide variety of techniques that are covered in the box for all the different conditions you might face in April.  I've seen other company's boxes that cover the season well, but it may only be one or two techniques.  If the conditions are wrong for the box, you won't be catching fish.  With the LTB, regardless of the conditions, something in the box is going to get you a fish!  The only downfall of a box like this is that it makes it difficult to go out and do what I attempted; a fish on each bait.  I tried anyway, and here are the results:


Lunkerhunt Bento Bait:


I rigged up the Bento Bait as a drop shot on a 7ft medium fast spinning rod with a 6:1 gear ratio reel. I use this set up as a finesse flippin' and pitchin' rig in shallow water.  I like to pitch out to shallow targets like rock piles, brush, or this time of year beds.  Just like flipping a Texas rig, I keep my kayak about 20 feet off my target, pitch out the bait and let it sit in the strike zone for a while occasionally giving the rod tip a little shake.  The high gear ratio reel allows me to get the bait back in quickly to set up for the next cast.  Most guys don't think to fish a drop shot this way.  Many think of the drop shot as a deep water technique designed to target suspended fish in the dog days of summer or cool winter afternoons.  But to me, a drop shot is one of the most versatile rigs around.  In fact, it's the only rig I have a dedicated rod for, and it's the only rod that comes with me on every trip regardless of the season.  It straight up catches fish year round.
In the springtime, I like to keep the distance from the weight to the hook relatively short, about 6 inches is as long as I'll go.  This allows the bait to slightly rise and fall just above the bottom, mimicking a small bait fish feeding on the bottom; or in the case of this weekend, slowly float it's way down to check out those tasty bass eggs.
The incredibly realistic detail in these little Bento Baits along with their subtle action drove the bass crazy this trip.  At almost $8.00 for a six-pack, they certainly aren't the most affordable plastics around, but they absolutely made for a fun day on the water.  If you're in the mood to try something new and looking to spend that birthday gift card or seasonal bonus, give these little guys shot and you won't be disappointed.


For more of my thoughts on the drop shot rig, check out my blog HERE.  In it, I cover several ways to fish the rig shallow or deep and in any season.  Can't get enough of the drop shot?  Check out everything you need to know to double the fun with the "donkey shot" HERE.


V&M Creature Bait on Mustad Grip Pin Flippin' Hook:


I was hard for me to put away those little Bento minnows.  I could have fished them all day and kept catching fish, but I came out with a goal, to catch a fish on all the LTB baits.  When I think creature baits and flipping hooks, I think of two things: standing timber, and tullies.  The lakes around here don't have much standing timber and Canyon is no exception.  However, back in Boulder Creek, a motorless-only section of Canyon Lake, there is no shortage of tullies and weed lines.
In the clear water of Arizona's reservoirs, it's easy to see pockets of hard bottoms in the weeds.  During the spring, bass will make their beds in these pockets, usually about two feet in diameter.  The thick weeds provide 360 degrees of protection from predators from the sides, but it leaves the top wide open to flip a bait into from above.
In my opinion, the 4/0 hooks in the box overpowered these relatively small baits.  I could barely fit the bait on the hook correctly.  Luckily, the bass disagree.  As it would turn out, my opinion didn't matter much as it only took 4 or 5 pitches into one of these weed pockets to tempt a 4-pound female to come out of the weeds and slam it on the fall.


RAW Panfish Swimbait:


If there were any bait in the box I didn't think I'd catch a fish on, it would have been this swimbait.  Not because it's not a great bait, but because I've never thrown a swimbait before.  Swimbaits seem to be an entirely different category of fishing out here in Arizona.  They are big fish baits, and they're the kind of baits that you throw all day long looking for that one quality bite.  Oh, and it's an incredibly slow kind of fishing.  I don't have the patience for it on a normal day.  I work a stressful job all week long, on my weekends I want to catch fish.  As many fish as I can.
To sum things up, I didn't know what I was doing with this thing.  It had treble hooks on it like a crankbait, so I threw it like a crankbait.  After the first cast I knew that wasn't going to cut it as it stayed about six inches deep the whole way in (it did look good in the water though, I could have sworn it was a real fish).
After about an hour of experimenting with location, depth, retrieve speed, and everything else I could think of, I headed back to the grass where I caught the V&M fish.  I made a long cast and pulled it in over top of the grass.  Once I was on top of one of these pockets I mentioned earlier I killed the bait and let it sink slowly into the pocket.  And I mean a real slow sink.  If you think a wacky Senko sinks slowly, this thing is going to drive you nuts with its sink rate.  After about 30 seconds of sinking I felt that ever so slight tick of a bait being inhaled by a big bass.  I set the hook and nothing moved!
Throwing those treble hooks into the thick weeds, I knew I was snagged.  As I paddled up to the snag to shake it free, it broke loose itself and my line began to swim away off to deep water.  Fish on!


6th Sense Lures Squarebill:


This is the lure I was most excited about.  I grew up fishing crankbaits and there will always be a special place in my heart for squarebills, the most exciting of all crankbaits!  There's just nothing like burning a bait through the shallows, banging it off a rock or stick up and seeing a five pounder jump out from behind the cover and slam it.
With that said, I don't spend big money on baits.  For one, I don't have big money.  But even if I did, I'm not going to spend more than five bucks on a bait whose purpose is to get deep down into cover and hit stuff.  Snags are far too common, and I'd end up leaving $40 worth of baits buried in the brush piles every trip.
The 6th Sense Lures Squarebill has the hand painted custom look to it that my wallet usually doesn't agree with.  It's also a bigger bait that gets a bit deeper than many other squarebills on the market, a huge benefit to our deep Arizona lakes where 15 feet of water is considered shallow.  This guy runs about 8 feet deep on the 12-pound copolymer I was throwing it on.  That's almost twice as deep as the Strike King squarebills I normally use.  The final thing that got me excited about this bait was it's flat sides.  A flat-sided crank has a tighter vibration than its rounder, fatter friends (imagine the difference in wobble between a Rat-l-trap and a Wiggle Wart).  A wide lazy wobble is great in the summer and winter when the bass are deep and lazy themselves.  But in the spring and fall when the bass are hungry and chasing down their meals, a fast, tight, vibration buzzing past them will really catch the attention of anything that's hungry.
The disappointing thing about this bait is that I didn't get it sooner.  Arizona temps are already in the 90's.  The Spawn is wrapping up and this bait will soon need to be put away until November.
Unfortunately, I was too excited to get this "big fish of the day" picture, that I wasn't thinking and took the lure out of her lip before snapping the picture.  This girl measured 19 1/2 inches and came in just under five pounds:


So what didn't I catch a fish on?  A few things.  There were so many baits jammed into these boxes I knew it was going to be a struggle, especially at a lake like Canyon Lake.  My goal was seven fish on seven baits.  I don't recall ever catching seven fish in one day at Canyon Lake, let alone each on different lures.

As I alluded to at the very beginning of this post, the baits in the box span a wide range of techniques for a wide range of conditions.  It would take a day of very wacky weather to create the conditions to match each bait.  The conditions I faced were very common for Arizona this time of year (and every other time of year in Arizona).  Sunny bluebird skies with just enough of a breeze to put some chop on the water.  It was too much wind for the spybait, and not enough for the jerkbait.  The odds were simply stacked against me.  I threw the jerkbait for about 20 minutes, but I didn't even take the spybait out of it's package (however, the next time I go to Lake Pleasant it will be getting used hard!)

The Buzzbait was the disappointment of the day.  I really thought it would get hit.  The added action the swinging hook gives looks great in the water, and it's one of the loudest, clack-iest, squeal-iest buzz baits I've ever thrown.  If I were to invent an excuse as to why it didn't get bit, I'd have to say it's due to the color.  My Buzzbait confidence is in white, especially for the morning top water bite.  Unfortunately the one I got was black.  I look forward to our upcoming Motorless Summer Nights tournament circuit where I'm sure this thing is going to catch me a top water toad at sundown at least once this summer!

This was my first month with Lucky Tackle Box, and it was a good one!  The result was a Motorless Tournament 3-fish limit of 56 1/2 inches, which will lead to a top 3 finish in just about any kayak fishing tournament you'll find.  As for a 5 fish bag that a traditional bass tournament uses, I added up just about 18 pounds worth of bass which would easily go top 10 in any of the "glitter rocket tournaments" around here.


Do you subscribe to Lucky Tackle Box?  Let us know about your favorite bait from this month's box in the comments!  Not a subscriber?  Check out Lucky Tackle Box today and insert promo code SAVE10 to get your first box for just five bucks!  Or, since LTB is just too cool, you can opt for the free lure option by entering FREELURE at checkout.


And as always, tight lines!

Monday, April 4, 2016

10 Reasons to Marry a Fisherman

10 Reasons to Marry a Fisherman:

     This is a blog in response to all the blogs out there like THIS one, or this one HERE, about how you know you're in a relationship with a fisherman.  They paint a rather bleak picture of who we are, and I'm not going to stand for it!  Fishermen have played an important role throughout history, they are some of the greatest men to have ever walked the Earth.  In fact, seven of Jesus's disciples were fisherman.  The calling of Jewish fishermen was the first step in which God would take to shine the light of the gospel on all people.  Yeah, God said that!

So, without further ado, here are 10 reasons you SHOULD marry a fisherman.


1. You always know where we are on the weekends, and it's never with that tramp from the bar last week because she won't wake up that early on a Saturday.

2. We're not afraid to touch stinky, green, slimy things.  In fact, most of the time stinky, green, slimy things give us a rush.  Just remember this next time the shower drain is clogged.

3. Our mood has a smell indicator.  When we come home smelling like fish, you'll know we're in a great mood.  This is a primo time to add something to the honey-do-list as we'll be much more likely to get it done without complaining.

4. We're a patient kind of people.  We sit around for hours and hours waiting for that one big bite.  Waiting 45 minutes for you to decide which dress to wear is nothing.  Besides, in that 45 minutes, we can watch 4 or 5 fishing videos on YouTube.

5. We always carry snacks with us, which can come in handy for a few days each month.  Beef jerky, corn chips, a PB&J, just don't be expecting any bananas.

6. You will learn how to back up a trailer, a skill that I'm willing to bet most of your lady friends don't have.

7. Shopping for gifts is easy.  A gift card to the local outdoors shop is NOT impersonal.  Another random Ugly Stick with a prepackaged tackle box of panfish tackle and a $15 multi-tool is VERY impersonal.  Still don't want to get him a gift card?  A subscription to Lucky Tackle Box is another great gift, check them out HERE.

8. We appreciate beauty.  Even on days where we catch fish after fish, we always come straight home and post a picture of the most gorgeous sunsets.

9. We are humble.  We might even be more humble than Moses, the most humble man in the world according to Moses.  We acknowledge the very few times we are outwitted by a species with a brain the size of a peanut.

10. You never have to worry about us running off with some other woman.  Adultery is way too time consuming, that's time that could be spent out on the water.  When we catch a trophy bass, we mount it on the wall and never let it go.  When we catch a trophy woman, we put a ring on it and never let it go.

Sunday, March 13, 2016

Central Arizona Lakes Kayak Launches

Central Arizona Lakes Kayak Launches:

The point of this posting is to help fellow kayak anglers discover new waters to fish and help grow the sport of kayak fishing in Arizona.  I will revisit from time to time to update this posting with more information as it becomes available.  If I have inadvertently given away your secret honey hole stacked with 6+ pounders, please let us know in the comments below.  To report a spoiler, please include the specific techniques and lure colors used to catch your secret fish and the posting will be removed within 48 hours.

Warning: Not all launches below are open year round.  Do your research before you leave to ensure the area is open to the public at the time. Also note that all launches below require the proper pass to park a vehicle.  For more information on parking requirements, visit http://www.fs.usda.gov/tonto/, and http://www.maricopacountyparks.net/park-locator/lake-pleasant-regional-park/.


Saguaro Lake

A:  Boat Ramps - Pros: Trailer parking, easy access to water's edge, courtesy docks, great fishing near marina and dam.  Cons:  Busy boat ramps, lots of power boat activity/wakes.

B:  Butcher Jones Recreation Area - Pros:  Motorless area, wide variety of cover/structure.  Cons:  Busy and pressured waters, 50 yards of beach to carry kayak across.

C:  Cove No. 1 - Pros:  Great fishing.  Cons:  Accessible only by 4x4, no trailer access.


Canyon Lake:

A:  First Water Creek - Pros: Big, big fish neighborhood, easy access to western side of lake.  Cons:  Tough launch, steep hill down to water's edge, roadside parking only, popular party spot for pleasure boaters.

B:  Accacia Recreation Area - Pros:  Extremely easy launch, short paddle to anywhere on the main lake.  Cons:  Very busy during the warm seasons, lots of power boats/wakes to watch out for, no trailer parking.

C:  Paloverde Ramp - Pros:  Easy launch, trailer parking, short paddle to Boulder Motorless Area.  Cons:  Single vehicle parking is a long walk from the water, the dumbest people on Earth seem to be drawn to this ramp, somebody will absolutely do something stupid.

D:  Boulder Recreation Area - Pros:  Large motorless area, great fishing.  Cons:  Difficult to launch on your own, busy/pressured waters, old nudist couple that lives on a houseboat at the marina, no trailer parking.

E:  Laguna Ramp - Pros:  Easy launch, trailer parking.  Cons:  Long paddle from most of the lake.


Apache Lake:

A:  Apach Lake Marina - Pros:  Easy launch, trailer parking.  Cons:  Dirt road access only, competition with power boats/wakes.

B:  Davis Wash - Pros:  Short paddle to Mazatzal Bay and other great fishing spots, very secluded launch area.  Cons: Dirt road access only, road periodically closes without notice.

C:  Burnt Coral Campgrounds - Pros:  Easy launch at boat ramp, lakeside campgrounds, great smallmouth fishing.  Cons:  Dirt road access only, fairly busy on weekends, always windy.

D:  Three Mile Wash - Pros:  Great smallmouth fishing.  Cons:  Dirt road access only, long drive from Phoenix area.  Note: Three Mile Wash is further upriver than labeled on the map.


Roosevelt Lake (Salt End)

A:  Windy Hill Recreation Site - Pros:  Lots of launching options with several beaches and boat ramps, launch from either east or west side of Windy Hill, lots of parking available, nearby camping available.  Cons:  Long drive from Phoenix, fishing has slowed down in recent years, can get busy on weekends.

B:  Grapevine Point - Pros:  Easy launch from boat ramp, good winter/summer fishing in the area with deep structure nearby.  Cons:  Long drive from Phoenix, fishing has slowed down in recent years.

C:  Schoolhouse Point - Pros:  Ramp is often out of the water leaving plenty of space for kayak launch, tons of shallow cover, unnavigable for most powerboats, a kayak flipping and pitching paradise.  Cons:  Long drive from Phoenix.


Roosevelt Lake (Tonto End)

A:  Horse Pasture Rec Area - Pros:  Drive down to water's edge for easy launch, lake side camping available, easy access to Tonto end of lake.  Cons:  Very busy on weekends, long drive from Phoenix, 4x4 vehicle is recommended for driving near the shore

B:  Cholla Campground - Pros:  Easy launch at ramp, trailer parking available, easy access to Tonto end of lake.  Cons:  Long drive from Phoenix, long paddle from productive fishing areas.

C:  Soltera Cove - Pros:  Drive down to water's edge for easy launch, rarely busy.  Cons:  Long drive from Phoenix, 4x4 vehicle is recommended for driving near the shore, long paddle from productive fishing areas.

D:  Vinyard Canyon Picnic Site - Pros:  Short paddle to great fishing to the west.  Cons:  No trailer parking, difficult launch down a rocky slope, long drive from Phoenix.

E:  Roosevelt Lake Marina - Pros:  Short paddle to great fishing in all directions, easy launch from ramps.  Cons: No public boat ramps at the marina, you need to make arrangements ahead of time through rlmaz.com.

F:  Windy Hill Recreation Site - Pros:  Lots of launching options with several beaches and boat ramps, launch from either east or west side of Windy Hill, lots of parking available, nearby camping available.  Cons:  Long drive from Phoenix, fishing has slowed down in recent years, can get busy on weekends.


Bartlett Lake:

A:  South Cove, Jojoba Ramp, Marina, ect. - Pros:  Easy launch from ramp, close to North Phoenix/Scottsdale, short paddle to great fishing, good numbers of bass.  Cons:  This place doesn't seem to have an official name and it makes it difficult to discuss with others, gets very busy during the summer, over populated with small fish.

B:  Rattle Snake Cove - Pros:  Motorless area, relatively close to the Phoenix area, good numbers of bass.  Cons:  Difficult launch, long haul for a kayak, a kayak dolly is practically required, no trailer parking, over populated with small fish.

C:  Srv Rd 459 - Pros:  Drive up right to the water's edge for an easy launch, great fishing in the immediate area.  Cons:  4x4 recommended when driving on the wash, check before hand if road is currently open to the public, over populated with small fish.

D:  SB Cove - Pros:  Easy launch from ramp, trailer parking available, short paddle from great fishing.  Cons:  Over populated with small fish, busy during the warm seasons.

E:  Cat Bay - Pros: Drive up right to the water's edge for an easy launch, great fishing in the immediate area.  Cons:  Often muddy due to low/changing water levels, 4x4 recommended for driving on sand, road closes periodically so check before driving up.

F:  Echo Bay - Pros: Drive up right to the water's edge for an easy launch, great fishing in the immediate area.  Cons:  Often muddy due to low/changing water levels, 4x4 recommended for driving on sand, road closes periodically so check before driving up.

G:  Jacks Cove - Pros:  Secluded launch.  Cons:  Often muddy due to low/changing water levels, 4x4 required for driving on sand, road closes periodically so check before driving up.


Lake Pleasent:

A:  Lake Pleasent Marina, South Ramp - Pros:  Easy launch from ramp, trailer and single vehicle parking near ramp.  Cons:  Poor fishing in the immediate area, competition against power boats/wakes.

B:  Lake Pleasent Marina, North Ramp - Pros:  Easy launch from ramp, trailer and single vehicle parking near ramp.  Cons:  Competition against power boats/wakes.

C:  10 Lane Boat Ramp/Shriff's Station - Pros:  n/a. Cons:  Poor fishing in the immediate area, ramp is always busy and filled with the overflow of stupid people from the ramps at Canyon Lake.

D:  Fireman's Cove - Pros: Drive up right to the water's edge for an easy launch, great fishing in the immediate area.  Cons:  Often muddy due to low/changing water levels, 4x4 recommended for driving on sand, parking permit is cash only via the envelope system.

E:  Castle Creek Boat Ramp - Pros:  Easy launch from ramp, trailer parking available, short paddle from great fishing, easy access to Castle Creek and great striper fishing.  Cons:  Lots of drunk idiots out with power boats disregarding the no wake regulations.

F:  The Northern Coves - Pros:  Great fishing in all of the northern coves, lots of easy launch areas where you can drive right up to the water's edge.  Cons:  4x4 vehicle is required to navigate the dirt roads and sandy washes leading to the water, go with someone who knows the way, or be real good at reading a map... A paper map, Google won't help you up there.

G:  Agua Fria River Access - Pros:  Easy launch and parking for trailers and single vehicles, great fishing in unpressured waters.  Cons:  Only open certain weekends throughout the year, check ahead online before you go out.


Did I miss your favorite spot?  Feel free to let us know about it in the comments, or of course you could always keep it a secret as well!

Tight lines!


Saturday, March 12, 2016

Boat Ramp 101


Boat Ramp 101 (aka, how not to be a dick):

The sport of kayak fishing is quickly growing, and so are our kayaks!  It's no longer unusual to have kayaks in access of 13 feet long and over 150lbs.  Moving the kayak from the top of your Subaru and onto a trailer pulled by a 3/4 ton pick up is more common than ever.  With more and more of us abandoning the long haul across the beach with our kayak dollies and opting for a simple trailer-launch at the boat ramp, it's time that we lay out some simple rules of boat ramp etiquette.  It's important to note that you don't need a trailer to launch at the ramp.  Car-toppers are more than welcome as well, and most (if not all) of these rules apply to you as well.  Follow these simple rules and you'll never have to worry about becoming the star of the show at the boat ramp:

Staging area/before you get to the ramp:

-Load your gear into your kayak.
-Take off the straps.  Leave just one for security if needed.
-Make sure any drain plug is inserted.
-Make sure any electronics you have power up correctly (lights, graph, ect.)
-Tie a rope to the bow to use for tying up after you've launched.
-Disconnect your trailer lights.

Backing down the ramp:

-Turn your headlights off.
-Stay in one lane (practice backing down your trailer ahead of time in an empty lot).
-Back down to the water's edge and disconnect the last strap.
-If your kayak sits on the trailer upright, back down far enough to where you can slide your boat right off the back safely into the water.
-Using the rope you tied on earlier, pull your kayak over to the dock and secure both the bow and stern to the dock.
-Get your vehicle out of there quickly.
-Don't turn your headlights back on until you are off the ramp.

Retrieving your kayak:

-Turn your headlights off.
-Stay in one lane.
-Back down to the water's edge.  Again, make sure you're far enough down that you can slide the boat onto the trailer easily.
-Untie your kayak from the dock and pull it into position and onto the trailer with the rope.
-Use that rope to quickly tie off to the trailer.
-Get back in your vehicle and pull up to the loading zone.

In the loading zone:

-Move quickly if people are waiting.
-Unload any gear back into your vehicle.
-Pull the drain plug.
-Wipe down the hull and check for any invasive species that may have attached themselves.
-Strap your kayak down securely.
-Reconnect your trailer lights.

Common Courtesy:

-Prepare for launching/loading away from the boat ramp.  Unless it absolutely has to be done at the ramp, you can do it in the parking lot, or out in the no-wake zone.
-Turn off your headlights while on the ramp.  It makes it incredibly difficult for others to back down the ramp looking into your headlights.
-If you are not there to launch/retrieve a boat, get off the ramp!  On that note, get your dog off the ramp too!  He doesn't have any thumbs, he is of no help when it comes to any activities on the ramp.
-Never leave your vehicle or kayak unattended on the ramp.  That's what parking lots and courtesy docks are for.  If you leave your kayak sitting unattended on a busy ramp, you deserve to have your paddle stolen.  You don't see guys beach their Skeeters up on the ramp, you don't get to either just because your boat is smaller.
-The line is formed by vehicles with trailers, not by the boats in the water.  This is just common sense.  If your trailer isn't here yet, get out of my way!
-Move quickly!  Nothing is more annoying than watching a young, fit, able-bodied 25 year-old taking his time at the ramp, BSing with his buddies while finishing his last beer for the road home.  If you're an old geezer with arthritis and gout, we understand if you don't move as quickly.
-Communicate with other boaters.  If the person in front of you in the staging area isn't ready yet, but you are, ask them if they mind if you jump ahead of them.  Assuming they won't mind will just make you look like a wiener.
-Don't be afraid to ask someone for help backing down the ramp if you suck at backing down trailers and it's busy.  I'd rather just do it for you than have to wait longer.  Just present them with your man-card.  They will tear off one corner and do it for you.  After all four corners are torn off, you will need to re-apply for a new man card, or be forced to wear a dress each time you go to the lake.

All I'm asking is, don't be "that guy".  Be courteous at the ramp.  Be friendly.  Be helpful to others who are struggling, and if you're the one struggling, be "man enough" to ask for help for the sake of everyone in line behind you.  Together, we can make Ramp Rage a thing of the past.

Thank you.

Friday, March 11, 2016

Kayak Fishing Game Plan: Pre-Spawn

Kayak Fishing Game Plan: Pre-Spawn

Spring is here!  Well, sort of.  While we still have one week of winter left, technically speaking, the bass in Arizona's desert reservoirs don't seem to know it.  As early as February water temps started hitting that magical 55 degree mark that so many anglers use to gauge the romance level of those little green beauties.  Well the fishing is picking up, and now is as good of a time as any to dive into one of the most productive seasons of bass fishing, the Pre-Spawn.

There are countless numbers of pre-spawn articles out there that discuss what lures and techniques should be used this time of year, and how you can go about locating the fish.  I would suggest you read as many as possible, but keep in mind that not everything you read necessarily applies to Arizona, or to kayak fishing.  The goal of this particular blog is to help synthesize all that information and discover how it applies to the desert kayak angler.  But first, a quick rundown on the behavior of bass this time of year:


Bass Behavior:

Bass, like many other species, rely on patterns and habits throughout their life.  Understanding these habits will give the angler insight on where bass will be found at any given time.  Spring time is especially predictable due to the spawn.  You see kids, when two fish love each other, they get together and make a wish...  Ah screw it, we're all adults here, they bang.  The water heats up and so does their sexual appetite.

Bass will begin to move up shallow over the course of several weeks.  As this transition into Spring progresses, they will begin to relate more heavily to cover rather than structure.  In the winter, bass will move down deep and sit atop underwater humps and points.  Imagine a game of King of the Hill.  A bass wants to be up high on that hill while inactive watching over a large deep area.  They don't feed as often in the winter and this underwater structure gives them the opportunity to go into standby mode and just wait for an easy meal to come by.  The warming waters speed up the bass's metabolism leading to more feeding activity and the bass will leave this deep structure in search of food and a lady-friend.

To find these migrating bass, check out a contour map of the lake you're on and look for areas of tightly grouped contour lines that lead in the direction of a spawning flat (generally in a cove that ranges from five to 15 feet deep).  Below is an example:


I like to think of this migration as the first "phase" of the pre-spawn.  Depending on how far away the winter home is from the spawning grounds it could take the bass up to two or three weeks to complete this migration phase.  The important thing for you to know is that they are hungry right now!  They may still be deep, but they are active and on the move.  They need to eat to complete their trek.

Phase 2 is what many anglers refer to as "staging".  Once they reach the outer edges of the spawning flat, they will wait until the time is right to move up on beds.  This generally begins happening when the water temp is around 60 degrees, but there are so many factors that the best way to know is to get up there shallow and start looking for them.  Below is a diagram that shows how a bass might stage and move up to beds.  Notice how in this diagram the fish relates more to cover (brush piles, stumps, ect. than it does to structure like in phase 1).


Here, A and B represent some sort of cover like a brush pile.  This is where a bass will hang out to feed while waiting for the right time to move up.  Target these kinds of areas and you'll find them.  Don't be afraid to really get into the middle of this cover with something weedless like a Texas rig or jig.  C is the nest.  You will probably see smaller males cruising up and down the bank looking for a place to build their nest.  These fish are very tough to catch if you can see them, but relatively easy if you stay back off the bank and pound them with small reaction baits.  Don't fall into the trap of trying to sight fish these fish, you'll just get frustrated and leave empty handed.

D in the diagram above is the pre-spawn pot of gold.  D represents the female.  The big girls are smart, they stay in bed and let their boyfriends do all the work.  They stay in the deeper areas, usually just deep enough to be out of sight from the anglers above the surface.  I like to start shallow and figure out how clear the water is.  If I have about 10 feet of water clarity, then I'll back out to about 15 feet and look for ledges and drop offs on my depth finder.  This is where the females will be cruising around and feeding heavily gearing up for the spawn.  Big lures are important here as these fish are looking for easy calories.  They won't be in the mood to chase down small baitfish, it's not worth it to them to spend that energy for a small meal.  Think big and slow and you'll have a shot at a pre-spawn monster.


Pre-Game:

A successful day of kayak fishing starts the days before your trip.  As I discussed in a previous post, a kayak angler needs to be able to find the fish before even getting to the lake.  Mapping website like the Navionics Web App, and Google Earth are a great place to begin your "internet pre-fishing".  Using what we know about bass behavior this time of year can help us pinpoint which areas to focus on.  As the old saying goes, 90% of the fish are in 10% of the water.  We've got to be able to find that 10% as quickly as possible so that we spend most of our time fishing in productive waters.


Let's take a look at a real life example: Lake Pleasant, just a short drive north west of Phoenix.
As you can see, this is a big lake.  You can't cover this entire lake in a weekend with a bass boat, so where do you start with a kayak?  One thing to focus on is water temperatures, we want the warmest water possible.  While looking at a map won't tell you how hot or cold something is, we can put the pieces of the puzzle together to tell us which areas will be warmer than others.  1.  Because of where the sun is this time of year, the north side of the lake will get the most sunlight and warm up the quickest.  2.  Shallow water warms up faster than deep water.  3.  Areas protected from the wind will warm up quicker than windy areas.  Due to these factors, we can eliminate the southern half of the lake and focus on the shallower northern arms.


So now what?  Each one of those three main arms are basically individual lakes to the kayak angler.  Pick the wrong one and you're going to have a long day as you won't be able to fire up the outboard and check out the next one over.  This time of year, I'm looking for as many small coves and pockets as possible, mostly shallow spawning flats with deep water near by.  I'm not as concerned with bottom structure as I am with visible shallow cover during the pre-spawn.  Bass will spawn just about anywhere that's shallow enough, but the big bass will claim the obvious places.  Look for big boulders, brush piles, overhanging trees, ect.  The same kind of cover that feeding bass will use as ambush points, spawning bass will use as defensive barriers to help protect their nest.  So let's pick an arm and zoom in.


Let's zoom in more....


Ah, now we're talking.  On the right side, we have a shallow cove filled with trees and other cover.  That's where the bass are headed, so that's where you should start.  As we come out of that cove we see a long shallow point.  This is the perfect area for bass to hang out in the weeks before spawn to rest and feed up before getting down to business.  On the left we have dirt roads.  That's a great sign for kayak anglers, roads don't just show up on their own, this area is clearly accessible as long as you have a capable vehicle to transport your kayak there.  (On this point, make sure you find several potential areas before heading out.  Google Earth won't show you the roads that have been closed off, or it may look like your Honda Civic will make it out there, but the "real life road" may be much more rugged than what it appears to be from a satellite image.)


Baits and Presentations:

When you're rigging up your rods the night before it's important to consider as many factors as possible.  Will it be windy, or calm?  Is the lake muddy, or clear?  Are the bass Trump supporters, or are they #feelingthebern?  Will it be overcast, or sunny?  These conditions will effect the finer details of your lures like weights, depths, and colors, but there are four general techniques that I'm going to prepare for every time I head out durning pre-spawn:

Deep-Diving Crankbaits


Regardless of the conditions a deep diver is going to catch fish.  There is one requirement however, you MUST fish it slow!  When thinking of crankbaits, most of us think of fleeing bait fish, deflecting off hard cover, creating reaction bites as the bait flies through an ambush point.  That's not the case here.  We are targeting big hungry females who are just "waking up" from the cold depths of the lake.  These fish aren't going to be in the mood to chase down their breakfast.  They want a large plate of pancakes slow rolled right by their pillows.  Big and slow is key when hunting for these big pre-spawn females.

There is one major factor that kayak anglers have to take account of when fishing a deep diver, and that is the weight of your kayak.  After just a few casts, you may notice your boat positioning has changed.  The drag of these heavy baits is enough to pull you along quite a bit, and that leads to several negative consequences.  The most obvious is that it will pull you off your spot.  Not a big deal if you're cruising down a shoreline, but if you're targeting a specific piece of cover or structure, you'll have to readjust each cast.  Secondly, your bait won't run as deep as it is intended to with the less resistance of a light kayak pulling on it.  And finally, your hooksets won't have the same force behind them as the kayak will give quite a bit when you pull.

So how can we counter these effects?  Anchoring is one option, but that's generally quite a hassle that most of us don't want to deal with, especially if we're covering water quickly to find fish.  The quickest and simplest thing you can do is to cast off to the side, perpendicular to your kayak.  Your kayak will have much more resistance as its pulled through the water sideways than it would nose first.  Another option is something I call Troll Casting.  It's a hybrid of casting and trolling a lure.  I make a long cast out behind me, past my target.  Before engaging the spool, paddle forward a few strokes to gain some momentum, then engage the reel and begin reeling slowly.  Super slowly.  Remember, you still have the speed of the kayak moving forward too, so you should reel even slower than usual.  Warning:  This may be against the rules of tournaments that don't allow trolling, if so make sure no one sees you do it.  ;)

Suspending Jerkbaits


The bigger, the better.  Remember, these fish are still moving pretty slow and they want big easy meals.  I prefer baits with three treble hooks on them just because they are bigger, but the smaller variety will still catch fish too.  Deeper is also better in most situations as most of the bigger fish will still be closer to the bottom in deeper water.  A bait that can suspend in 8 feet or deeper is ideal during the pre-spawn.

The first step is making sure your bait suspends properly.  Most jerkbaits will float, even the ones marketed as "suspending jerkbaits" will slowly rise to the surface.  I will usually add an extra split ring hanging off the split rings on the front two hooks.  If that's still not enough weight, I will put larger hooks on.  If that still doesn't cut it, I'll find a new brand of jerkbaits.

Working the jerkbait from a kayak can be difficult for two reasons: being low to the water, and the wind.  If you can stand in your kayak, do it!  To give the bait the best action, you want to pop the rod tip downwards.  That's not easy to do while sitting down at water level.  If you can't stand, you can still get by with popping the rod to the side.  Just be careful not to get yourself in an awkward position to where you can't set the hook when you get bit. 

The bigger problem is the wind, and that leads us down to a Catch-22 of catching fish.  Jerkbaits typically work great in the wind.  In fact, many people will only throw a jerkbait when it's windy.  The problem here is obvious: kayak fishing sucks in the wind.  It's nearly impossible to hold your position and work the bait at the same time.  Long pauses are important when fishing jerkbaits this time of year, and if you're being blown across the surface, your bait isn't going to pause, it'll get dragged along with you.  If you don't have the "Hobie advantage" of hands-free paddling, you need to anchor.  A drag anchor won't cut it.  You need to be absolutely stationary.  Rather than deploying an anchor, I prefer to tie off to buoys, it's just quicker and easier.  In many of our Phoenix area lakes, many major ledges and points just happen to be marked off with buoys.  You could travel along a long buoy line tying off to each one, fan cast the area, move to the next and catch fish all day.  I could give you examples, but you're better off to check it out for yourself.  So next time you're out on a lake, check out the depth changes along buoy lines, or just check it out on a contour map.

Jigs


If you haven't noticed yet, the theme of pre-spawn is big and slow.  What's bigger and slower than a jig dragged along the bottom?  I'll tell you what is, the building of the Great Pyramids of Giza.  However, gigantic monuments built in honor of ancient leaders aren't the best bass fishing lures.  So let's just stick with jigs.

If you're catching fish with red lips (quite common this time of year) then the fish are zoned in on eating crawfish.  A jig can be one of the best crawfish imitators there is.  If you're catching fish on cranks or jerkbaits and the bite dies down, before moving on to a new spot, give the jig a try.  If you were catching fish, then there are fish in the area.  Rarely do they move from one area to the next that quickly, so they are still home but have just wised up to your presentation.

I work a jig very little this time of year.  The deep water is still quite cold and nothing down there moves around too fast.  Hopping and swimming a jig is just going to spook off any bass, it's simply unnatural and the fish won't want to touch it.  I use a retrieve that's just one degree above dead sticking.  I cast it out to a target, maybe across a rocky point, or on top of a ledge, then I let my drifting kayak slowly pull it along.  You'll feel it getting caught up in rocks and what not but just shake it free and pull it over the top.  Don't let it pop free and hop off the bottom, just keep slowly dragging it.  When you get hit you may feel a slight tick, but most of the time a fish is just going to calmly pick it up and you'll lose contact with the bottom.  When you stop feeling those rocks, set the hook!

Spinner Baits/Chatter Baits


Everything that applies to deep diving crankbaits applies to spinner baits and chatter baits.  Honestly, if feel that the differences are more angler preferences than the preference of the fish.  There's really only one reason I prefer cranks over blades personally, and it's really quite silly.  But it's storage.  I use a Plano box system for tackle storage, and spinners just don't fit in there as nicely as cranks.  However, I keep a handful with me just incase I run into two conditions.  1. An algae-filled mucky bottom.  The kind of bottom when you have to pull green slime off your crankbait after every cast.  The single hook on a spinner or chatter bait will come through that gunk much cleaner.  2.  Muddy water.  Like, really muddy water.  When visibility is less than a foot, I'll use a chatter bait, or a spinner with a Colorado blade.  The reason is because I can load the plastic trailer up with scent, and the blades put off more vibration than cranks.  The less you can rely on sight, the more you have to focus on the other senses to get the fish's attention.


So there it is, my game plan for kayak fishing in the early spring.  As I put the finishing touches on this article, many fish are already up on beds as the water temp is on the rise.  But here comes the most important hint for spring time fishing:  THE PRE-SPAWN IS NOT OVER JUST BECAUSE FISH ARE ON BEDS.  They don't all spawn at the same time. They move up and spawn in waves, usually three to five waves per year.  This is nature's way of protecting the species and preventing an entire year's class of new bass from dying in the case of some catastrophic event like a flood or sudden cold front that kills the eggs.

Sight fishing is fun, and it's an easy way to catch one of the biggest fish of the year.  But don't let it consume your fishing trip.  It's easy to get pulled in by a bass on a bed and then realize that you've spent an hour on a fish that ultimately won't take the bait anyway.  Sight fishing is one of 500 ways to catch a fish this time of year.  So go hit those migration routs and pull in big fish after big fish while your buddy sits up in the shallows hunting those little males protecting the nests.

Tight Lines!