Sunday, June 28, 2015

Rigging a Fishing Kayak on a Budget

    I get a lot of compliments about my kayak when I'm out on the lake, quite a few times people have  mistaken it for a fully rigged Hobie.  From a distance, I can understand why, it would appear as though there's some serious money invested.  Now, I'm going to give you all a close up tour of my kayak to show you how I fool people into thinking I have an expensive set up.

    First of all let me tell you a little about my kayak straight from the shelf.  It's a Lifetime (yep, the picnic table company) Tamarak Angler.  They carry them at Sports Authority for $449.99.  However, Sports Authority almost always has sales or coupons on their larger items.  After using my coupon I got from buying tortilla chips from Fry's, I paid $359.98 ($362.47 if you include the price of the chips).  I did quite a bit of research on kayaks in this price range before buying this one and it came down to these three details:

- It has a flatter bottom than any other kayak I looked at.  While a flat bottom will make a kayak slower and not track very well, it makes it more stable to stand up on, and I can store it and transport it right side up without worrying about warping the hull.
- It was the only kayak in this price range with access to inside the hull at the front and the back.  This makes it better for storage, but also for rigging.  You need to be able to reach inside to run cords for electronics, and screw nuts on to the bolts you'll be using to rig up various things.
- The color matches my car.

    WARNING: Before you go off and buy this kayak because of the things I say about it, I need to let you know that I'm a pretty small dude at 5'7", 150 lbs.  This boat is 10 feet long with a weight capacity of 275 lbs.  I would not recommend this kayak to anyone over 6 ft and 200 lbs.  it's just too small and standing up would be quite risky.

    Below are six relatively simple DIY projects you can do in just a few weekends to save all kinds of money:

1. Anchor Trolly


    Besides a fish finder, one of the first things I recommend is an anchor trolly.  Some of the higher end boats have these pre-installed.  If not, you can expect to pay about $30 for a kit.  My solution will come out to about half that price, plus an added advantage over the kits.  The kits you can buy use a metal ring or triangle to pass the anchor line through before tying off the other end.  My solution uses a carabiner wich allows you to keep both ends of the line tied down while you just open the carabiner and snap the line through.

What you will need:

Carabiner - $0.98
Paracord- $3.98
Pully - $2.95 (x2)
Eye Screws - $0.26 (x5)
Bungees - $2.47

Total: $14.62
Cabela's Kit: $31.99
Savings: $17.37


2. Anchor

    What good is an anchor trolly without an anchor?  The tricky part here is getting the chain inside the inner tube.  You won't be able to push it through, you'll have to pull it.  The first step is to tie the paracord to the chain, pass the cord through the innertube so it comes out the other end of the tube.  Lube up the chain with... Your preferred lubbing substance... And work it through all the way.  Tie off the end with zip ties and you're good to go!

What you will need:

Rope: $2.78
Carabiner: $0.98
Paracord: $3.98 (but you already have all you need from the anchor trolly)
Bike Innertube: $5.41
Zip Ties: $3.94 (for a 20 pack, you only need 2) - $0.40

Total: $11.63
Austin Kayak Anchor: $19.99
Savings: $8.36


3. Chair


    This is one of the biggest money savers I have discovered yet.  Cheaper kayaks like mine come with seats that are a pain in the ass, literally.  Nice kayak seats are more comfortable, but more importantly they sit up higher.  They are also crazy expensive!  It took me a while to find a seat I liked.  In fact, I gave up looking and was about to pull the trigger on a $350 Wilderness Systems seat.  However, one day I ran out of salsa!  What's a man to do when he runs out of salsa?!?!  Well, I'll tell you what I did.  I went to the grocery store, that's what I did!  And what did I find at the grocery store, you ask?  Salsa.  Salsa, and this chair!  It's not perfect, maybe an inch or two too big to really fit nicely.  But it was $11.99!  I used paracord, that I already had from other projects, and tied down the back.  You may want to tie down the front as well, but I chose to leave it untied so I can flip it backwards during transportation.

Total: $11.99
Wilderness Systems: $349
Savings: $337.01


4. Rod Holder/Crate/Rudder Combo


    The only downside to this is how big it is.  There are all kinds of DIY kayak rod holders on the Internet, but have you ever seen one with a built in rudder?  No?  Well scroll up just a bit, there's one right up there!  Some tutorials for rod holders I've seen spend a lot of time heating up the PVC and molding it around a glass bottle, then cutting a slit in it, and blah blah blah.  Well, I didn't do all that and haven't had a problem yet.  One and a quarter inch PVC is large enough for any rod I have to fit in, the frame and rudder is made of just one inch PVC.  Each kayak is built differently, so you'll need to measure yours and custom built it to fit.
    
WARNING:  I don't trust PVC cement alone with holding my expensive rods and reels above the surface.  So, in addition to the cement, I drill a screw into each connection to hold them together better.

What you will need:

10 ft of 1" PVC Pipe - $4.66
10 ft of 1 1/4" PVC Pipe - $5.06
PVC Cement - $4.94
Various PVC Adapters - About $20
Screws - $6.47
Spray Paint - $5.98
Milk Crate - $9.99
Paddle - $24.07

Total: About $80
YakAttack BlackPak: $124.95
Ocean Kayak Universal Rudder: $225.00
Savings: $268.78


5. Steakout Pole

    A steakout pole is a huge benefit in the spring, when bass are shallow spawning and you're sight fishing.  Whenever you need to hold position in water less then 4 feet deep a steakout pole out performs any standard anchor.  All you need is a four to five foot section of 3/4 inch PVC pipe and a PVC Tee adapter.  Cut the bottom into a point so you can jam it into the bottom of the lake, river, or stream.

PVC Total: $5.34
YakAttack ParkNPole: $59.95
Savings: $54.61


6. Kayak Cart

    Like the PVC rod holder, different kayaks will require different measurements.  The most expensive part of this kayak cart is the wheels.  They can be very pricy at Home Depot or Lowes, but if you have a Harbor Freight Tools nearby, you can find them there for five dollars.

What you will need:

PVC Pipe and Fittings - About $20
Wheel Barrow Tires - $10
Hardware for attaching wheels - About $5

Total: $35
Austin Kayak C-Tug: $149.95
Savings: $114.95


Alright, let's add up the costs and savings and see where we stand:

Total Costs of DIY Additions: $158.58
Total Cost of Non-DIY: $959.66
Total Savings: $801.08

Just imagine the fishing gear you can buy with $800 in savings!  Now, just for fun let's take it one step further:

Lifetime Tamarak Angler w/ DIY Projects: $521.05
*Old Town Predator MX w/ Non-DIY: $2,258.66

Savings: $1,737.61 

Yikes!  Kayak fishing doesn't need to be expensive, folks.  I understand that often times you get what you pay for.  The non-DIY accessories will no doubt be of higher quality and will out last any of these DIY projects.  The ideal fishing kayak probably lies somewhere in the middle of this spectrum.  I just want to show you that there are plenty of other options out there than what you will find in stores or online.  Try just one or two of these and you'll free up some room in your budget for that new rod and reel combo you've been eyeing.


* I picked the Old Town Predator for comparison's sake because that was the first kayak that was recommended to me when I began my search for a kayak.


Monday, June 8, 2015

Arizona Summer Fishing Tips


    Ask any fisherman about their favorite part of our long, hot, Arizona summers and you'll probably just hear them grunt and groan about long wait times at the launch ramp, wake boarders tearing up the otherwise calm lake, and the mountains of trash created by the merry nature go-ers around the Phoenix Metro area.
    Before you start shaming others on social media, or head to the local rec center and organize a trash clean up/community picnic, consider the bennifits of littering yourself:  1. Colorful trash will brighten up and add color to our otherwise bland desert landscape.  2. People get paid to pick up trash, not littering would result in those poor folks losing their jobs.  3. It provides plenty of artificial habitat for our favorite fish and wildlife species.  4. Everyone else does it, what difference will your styrofoam bait cup and bud light can really make anyway.  And, of course, 5. Those dang trash recepticals are all the way on the other side of the road.

    Since this is a fishing blog, I want to focus on the third point stated above.  Trash in our waters provide much needed habitat for all of nature's beautiful creatures.  An abundance of these man-made habitats in our lakes will provide the state's bass population with what fisherman refer to as "cover".  Bass use this cover year-round in hunting prey, spawning, and for those warm post-front conditions when they just want to chill in the shade with their homies.  Just look at all this garbage that the Game and Fish Department is willingly tossing into the lake:

    So, as bass anglers, how can we use all this trash to our advantage?  Below I've outlined some of the most common trash piles that you will likely come across in our summer waters.


1. The Classic Tire

    Tires are great, just look how happy those turtles are.  A tire, partially exposed above the surface like in the picture above, provides structure similar to a boulder.  This shallow cover can be used as an ambush point by bass, especially early in the morning and at dawn when the shad begin to migrate towards the shore line.  Try top water poppers in the morning and at dawn, as well as white spinnerbaits throughout the day.  Like any shallow cover, work from the outside towards the center from multiple angles.
    A fully submerged tire in 1 1/2 to 3 feet of water is ideal in the early summer when the bluegil have moved up shallow to spawn.  You may find a nest of these bluegil inside the tire, and several other nests nearby surrounding the tire as bluegil often like to spawn as large schools, kind of like the flower power generation of the sixties.  A chartuse and blue squarebill crankbait can be deadly anytime the bass have moved shallow and into the bedding bluegil to feed.
    But of course, the most common place you will find this type of cover is along the shallow river banks of the Salt and Gila Rivers.  In current, large tires create large current breaks.  A current break is exactly as it sounds, a break in the current.  This provides slack water that a lazy bass will rest in while awaiting his meal to float by in the outside current.  Position your boat just down stream of the tire.  Cast a a crankbait or spinner bait upstream of the tire and work it back slowly and naturally with the current past the tire.  A small jig or shakey head worm could be worked in the same way, but slower, if the fish are especially tight lipped that day.

2. The Blue Light Special

    A staple in the urban fishing program, a shopping cart may provide the majority of structure in many of Arizona's urban lakes and streams.  But nature-goers, don't worry, I've come across the blue light special as far east as the Salt end of Roosevelt, and as far west as LA.
    Think of the shopping cart as a metal brush pile that's much less forgiving to your crankbaits.  Get your Strikeking 5XD snagged on one of these bad boys and you best be getting out the clippers.  Shallow or deep my go-to lure here is a jig.  Shopping carts have lots of nooks and crannies for those sneaky bass to hide in, so you'll want to make plenty of casts before moving on.  I like to use no less than 50 lb braid with my drag cranked down.  Just like fishing in thick brush, you want to pull that bass out of there quickly to avoid him pulling your line into the sharp metal edges of the cart that can easily cut 20 lb flurocarbon.
    If a jig doesn't get the job done, you can try a faster reaction bait like a small swimbait.  Just make sure that hook is buried deep in the plastic so your swimmy doesn't suffer the same fate as that 5XD.

3. Flippin' and Pitchin' the Mats

    When the trash begins to really mat up around the 4th of July Weekend, I like to bust out the heavy flippin' and pitchin' gear.  The trash creates a thick canopy on the surface providing plenty of cool shade for that lunker bass.  Ideally, look for trash mats in the backs of shallow coves in 2 to 4 feet of water.  Butcher Jones and Cove #1 at Saguaro Lake are prime spots as the water depth is just right, and the nearby recreation areas provide plenty of jack-ass litterbugs.
   The biggest bass will hold tight to the larger pieces of trash as science has proven that bass take pride in their personal belongings.  Much like humans, their cast system is based on greed and material possessions.  You might just find a small school of four-pounders aggressively protecting that 84 oz. ThirstBuster.  Because of this territorial behavior, short accurate casts are a must as the bass will not move more than 12 inches out of its strike zone.
    For more information on what gear to use and how to fish it effectively, see last weeks post regarding punching grass mats.

4. The Bride

    Fishing brides can be great when there is a steady wind or current.  I fish brides the same way I do bridge pillars.  If there is wind or current, I'll position the boat on the down wind side.  Brides, like tires, will act as a current break.  The ambushing bass will wait on the down wind side and wait for the baitfish to flow by.
    Often times fish can become very active around brides, so I like to start with a fast moving reaction bait.  Cranks, spinners, and swimbaits will all get the job done.  My first two casts will be parallel with the current along both sides of the bride.  If I get no bumps I'll switch to a small finesse bait like a shaky head or drop shot.  I'll stay on the down wind side of the bride and cast as close as I can to the sides, ideally within inches.  Often times with a soft plastic I'll cast right into the side of the bride, as the bait hits I'll drop my rod tip creating as much slack in the line as I can so that the bait can fall straight down along her side.  Most of the time the bass will hit it on the fall.  If not, I'll let the worm rest for just a second or two, hop it once and then lightly shake it.  If I haven't got bit by then I'll reel in a recast.

5.  The Lazy Boy

    In my college days, I would approach this senario differently.  My friend Dale had a truck, I would have called him up in an instant and offered him a 12 pack of bud to help me pull this thing out and set it up in the dorm.  Well times have changed.  I get my sofas from Ikea now, and Dale goes by Susan.  He...  She, also wouldn't accept the cheap beer anymore, I'd have to step it up to at least a locally brewed Hefeweizen.
    If you're going to fish it go with something weedless.  A jig or weedless wacky senko would work well.  The reason for the weedless approach is just out of courtesy for the next college-aged numbnut to happen across a new sofa.  Snags could lead to large tears, and duct tape can get expensive.
    I would approach this much like The Classic Tire.  Work the edges first, then move into the center of the cover.  There's two reasons for this:
1.  If you go straight for the middle, but miss your target and snag up on it first cast, you're going to disturb quite a bit of the area around it, spooking off any potential bass that might be there.
2.  If there's one bass, there's probably more.  I like to pick off bass from the sides of a small school because I feel that there's less of a chance of that bass disturbing the others.  If I were to go right in after the middle one, he may spook off the whole remaining school.

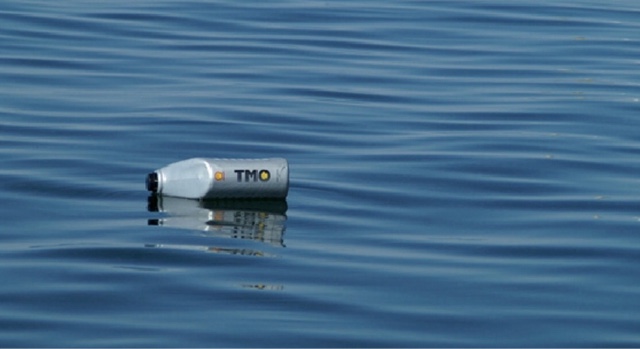
6.  Target Practice

    "Hey man, I bet I can hit that oil can from 40 yards out with this Red Eye Shad..."

    "But why, Brah?"

    "Dude, just watch....  Tssssssssssssssssssss, splash.
  .... Ah crap."


    So there you have it.  Next time you consider packing out more than you brought in, reconsider.  It's for the good of the fishery.  Next week, I'll share with you my favorite recipe for Pre-Spawn Female Largemouth Bass.